First, a few technical points:
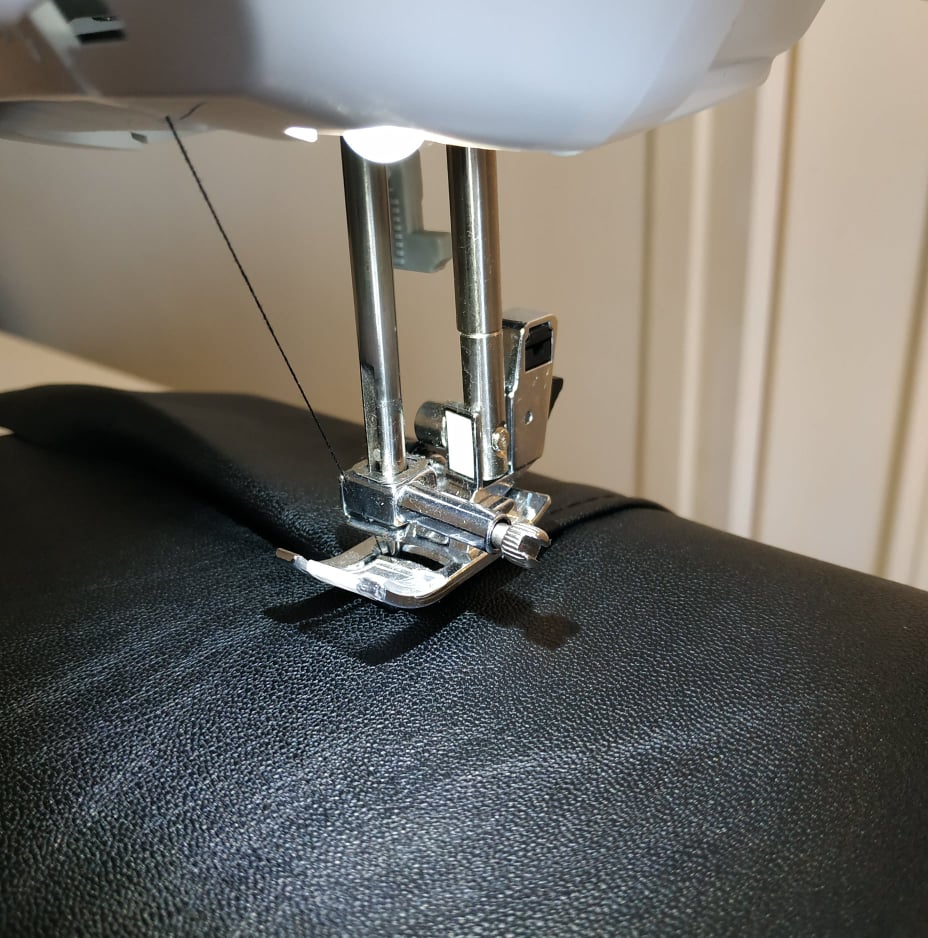
 The presseur foot
Special feet exist for sewing materials that are not very slippery such as imitation leather, this is the case for example of teflon feet or roller feet. Overall, they will help the machine pull the fabric under the presser feet while sewing.
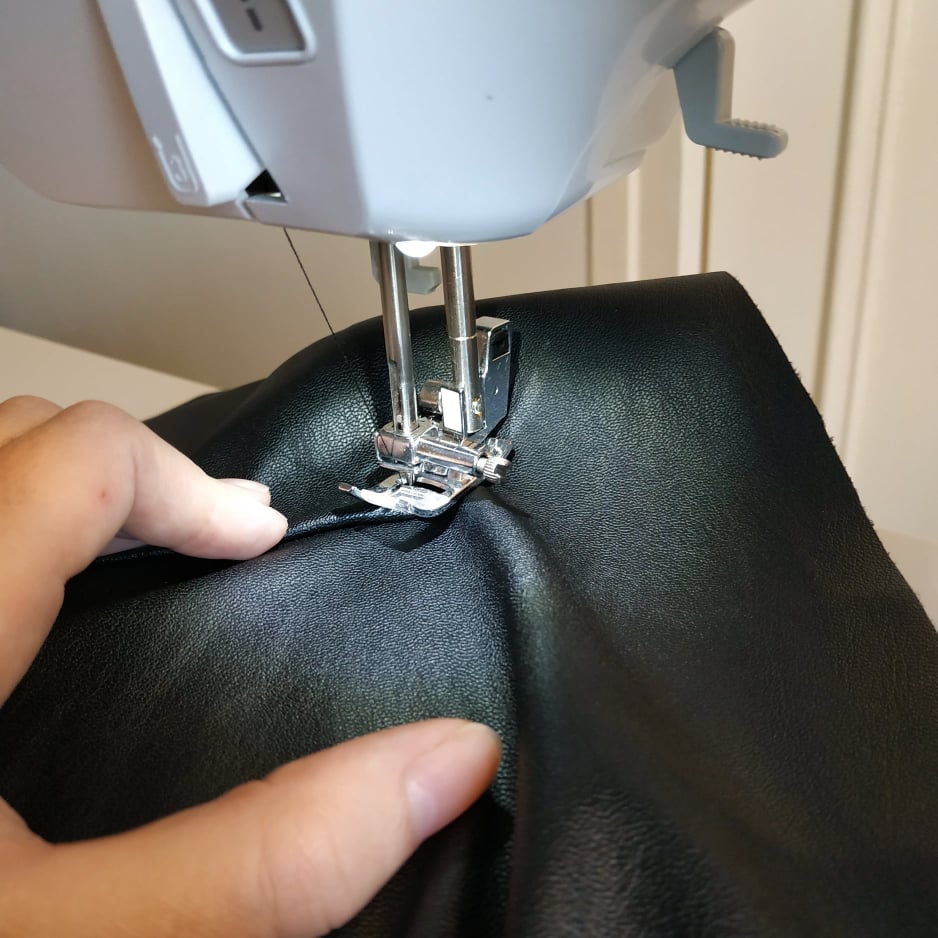
However, it is also possible to sew without one of these types of pressing feet, with a little imagination.
Option 1 : You can place a strip of parchment paper between the place of the imitation and the foot of the machine. In fact, on the right side, the material risks snagging the foot and therefore slipping very little during sewing. You will need to sew with a stitch width between about 4 and 5mm then gently remove the paper between the stitches.
Option 2 : It is possible to overcome this problem by placing a strip of masking tape or tape under the presser foot. This will encourage movement of the faux leather when sewing.
(Original) option 3 : Are you adventurous? Did you know that it is also possible to pass Vaseline on the imitation? Yes yes, one could believe in a wacky remedy but that’s it. On the right side of the material, apply a finger (just a finger) of petroleum jelly along the edge to be sewn. You can replace Vaseline with hand cream or lipstick. The imitation will not absorb the material, so there is no risk of stains.
The needle, the thread and the seam
The needle : On a thin simili, a standard 80 needle can do the trick, but if the simili seems thick enough, a 90 or 100 needle should be preferred.
The thread : A simili material does not require the use of a particular thread, so use a classic thread with which you are used to sewing. We recommend a polyester thread.
The seam stitch : Since simili is a thicker material than many fabrics, avoid rolled hems. Keep the seam allowances the same but tuck the fabric inside out, folding only once. If necessary, add a few half centimeters in hem width compared to the recommendation in the instruction booklet. Sew the seams with a straight stitch, with a stitch width of approximately 4 to 5mm. If you don’t have a serger, a zigzag stitch will work just fine (select wide and narrow stitch)
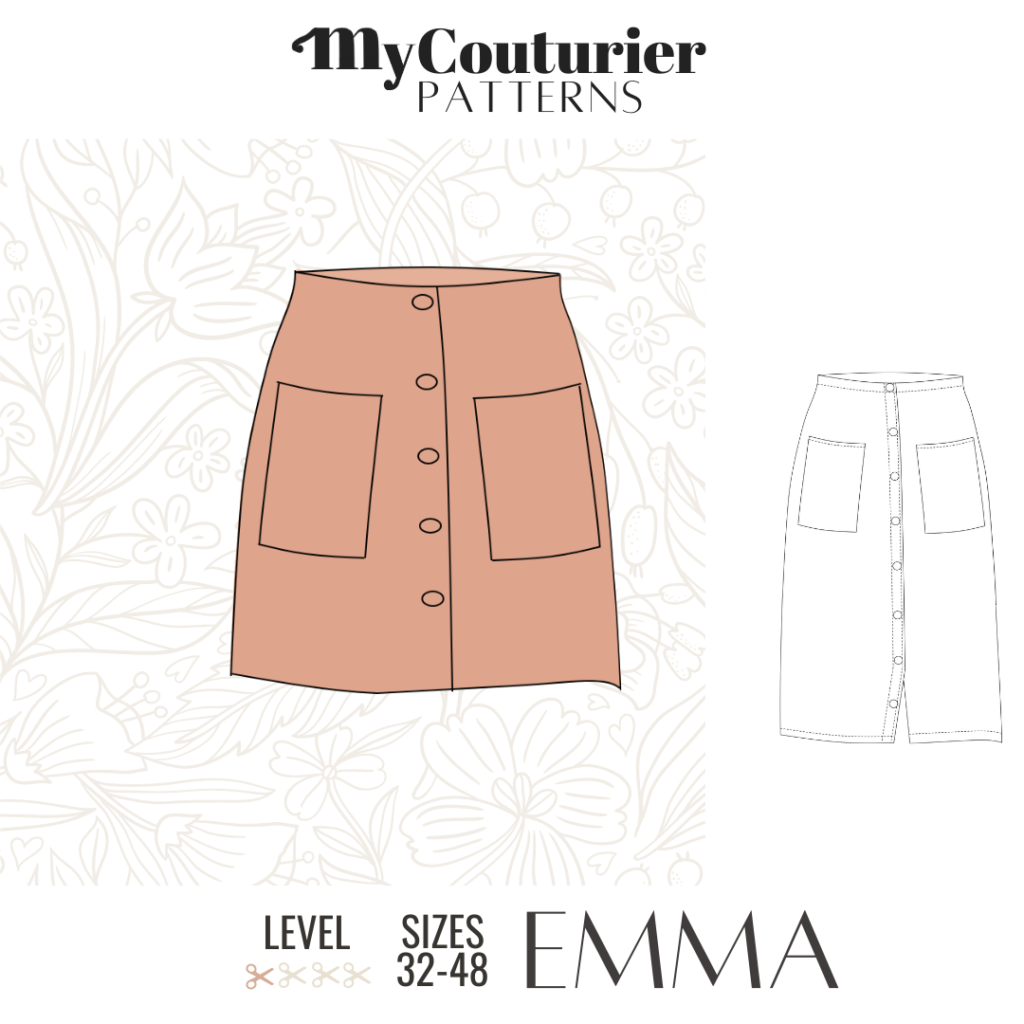
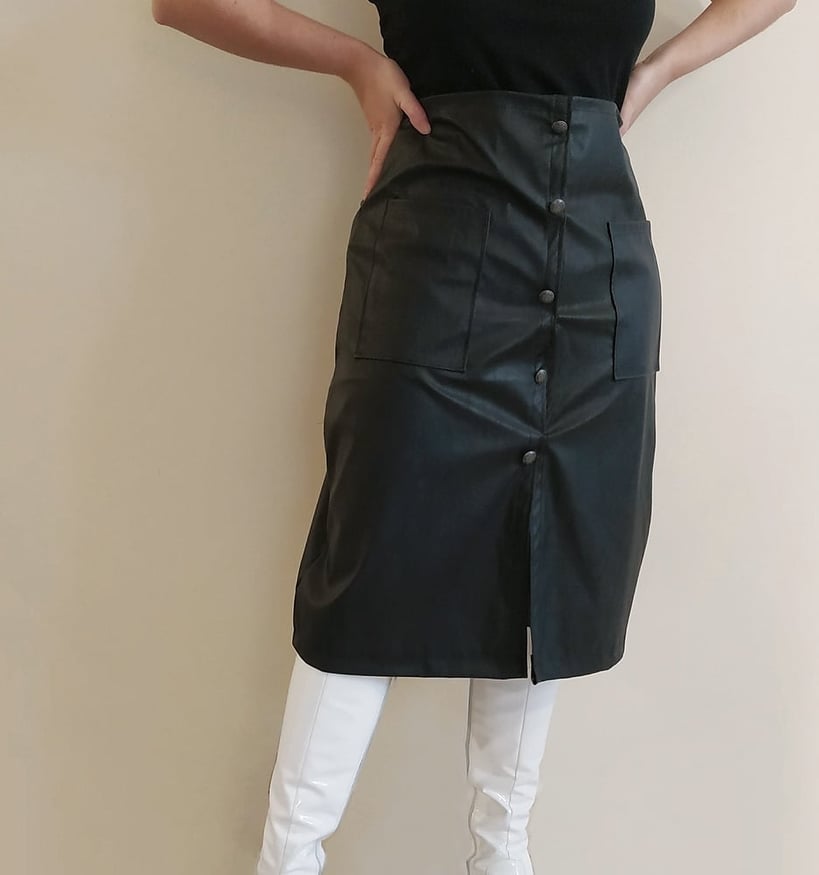
 Etape 1 – The placket
Sew along the button plackets with a straight stitch, creating two parallel seam lines at 0.5 and 1.5cm. Use fabric clips instead of pins, because not only is it not easy to prick the imitation with pins, but in addition to that, traces could appear on the place and damage the finished garment.
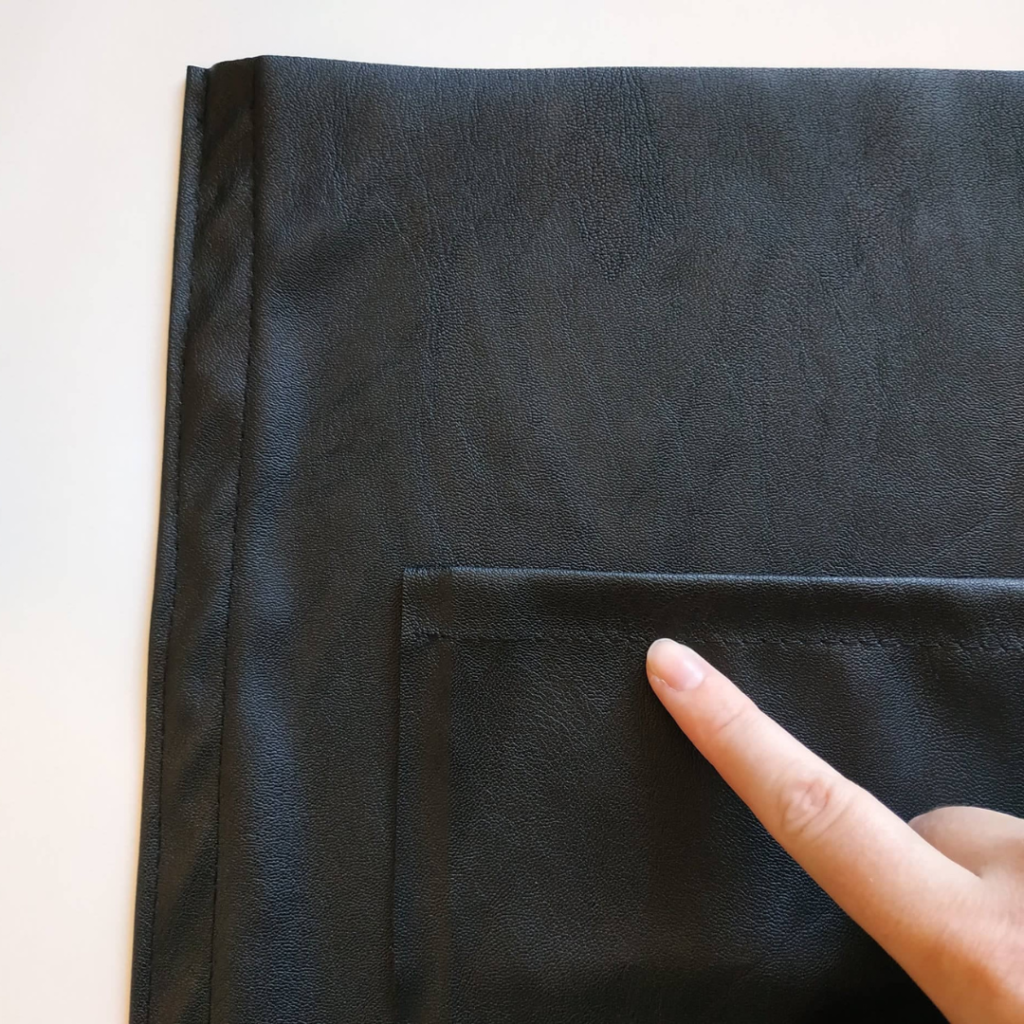
Etape 2 – The pockets
Fold the edges at the top of each pocket upside down by 2cm, then stitch with a straight stitch (stitch length 4 to 5mm). Mark on each front part of the skirt the locations of the pockets according to the marking on the pattern.
Etape 3 – Assembling the skirt
Match the sides of the two front pieces to the sides of the back skirt right sides together. Place your pliers to stabilize the edges then sew with a straight stitch. As the seam is done on the wrong side, the fabric should normally glide better. However, do not hesitate to use the methods of the place if necessary. In addition, we advise you to either overcast the inside seams or iron them to lay them down.
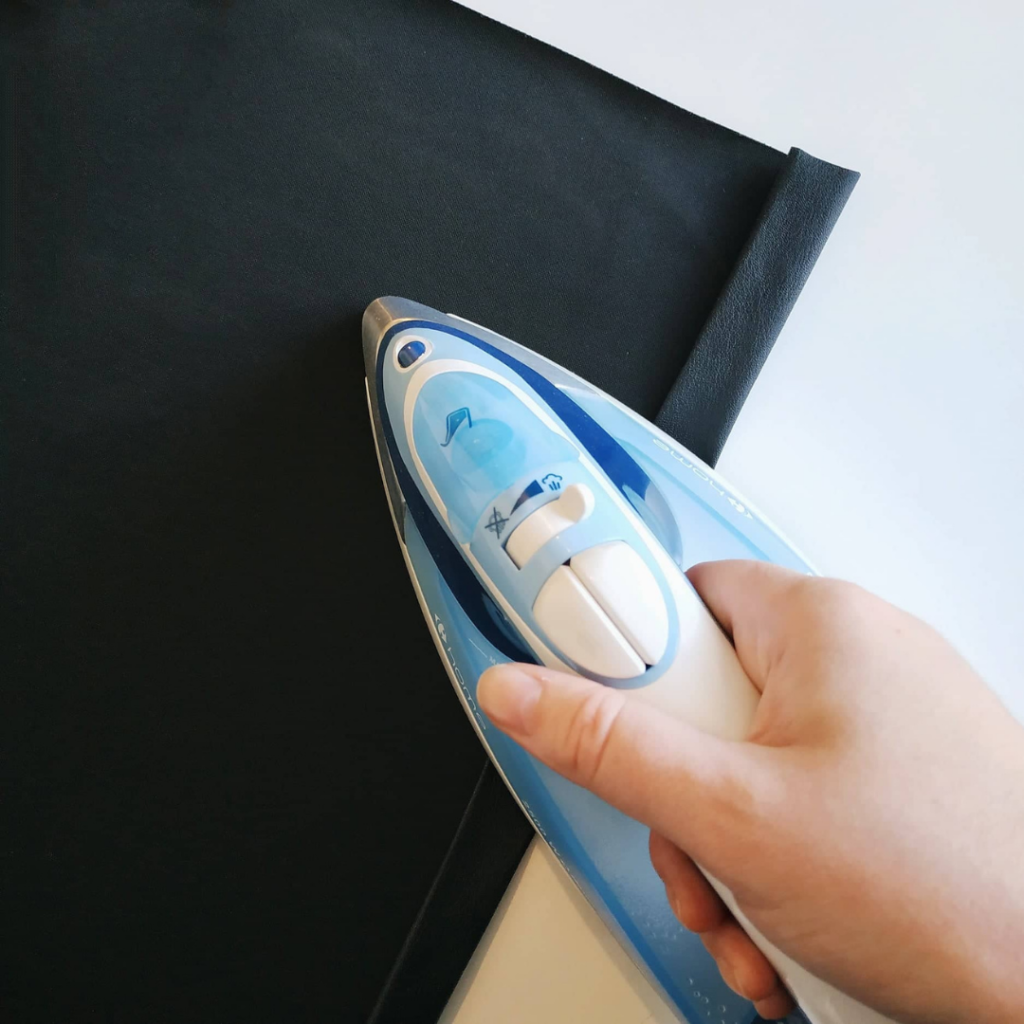
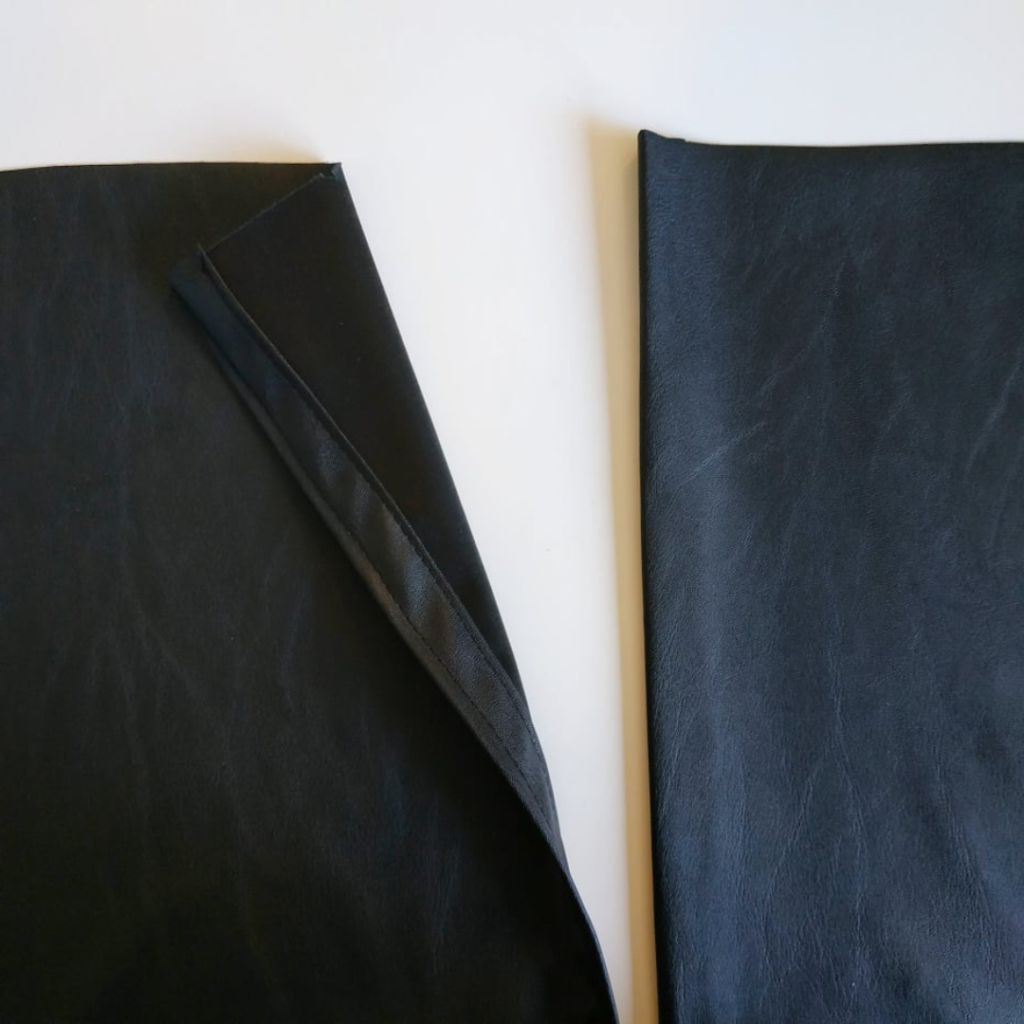
Etape 4 – The finitions
As seen earlier in this tutorial, use the iron to help shape the simple hems. Instead of creating a rolled hem of 2cm x 2, make a single fold of 4cm, and move the topstitch initially planned to 1.5cm to 2.5cm approximately. You can also overcast the raw edges.
Then place the button markers following the pattern markings, and reproduce the buttonhole markings at these same locations.
Step 5? You have sewn well, and enjoy now! And why not share the photos of your imitation leather creations with us? You can also find us on Instagram with @mycouturier_patrons and if you liked this tutorial, share it with 2 people who love sewing like you!
Couturely yours